Tattooing is the only art form in human history that breathes, bleeds, and ages. It is a discipline where there is no eraser, no “undo” button, and no margin for error. To mark the skin is to alter a human body forever. It is a profound responsibility that demands more than just artistic talent—it demands technical mastery.
Many aspire to this career, drawn by the romance of the lifestyle, but few survive the industry. Why? Because they treat tattooing as a hobby, not a profession. They focus on the drawing, but ignore the science.
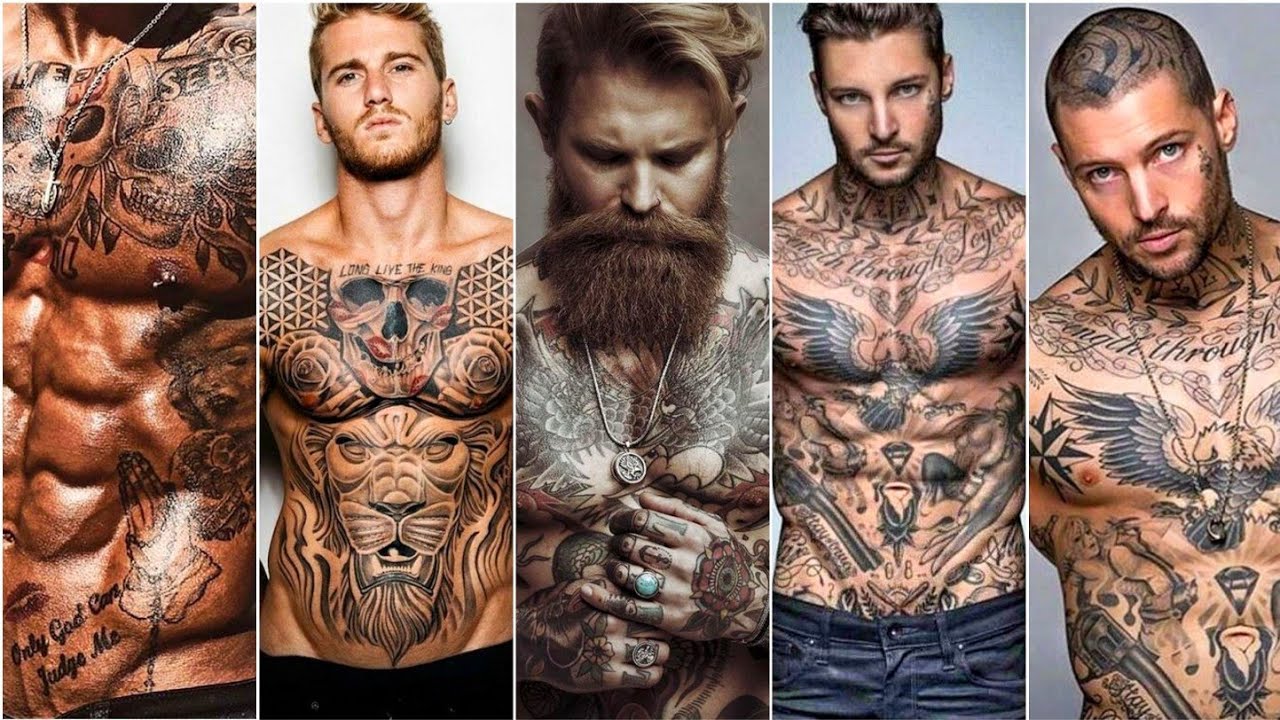
Tattoo training course
We are here to bridge the gap between the “scratcher” and the Professional Artist. In this comprehensive curriculum, we strip away the mysticism and hand you the engineering manual for the modern tattootrade. We do not just teach you how to trace a line; we teach you the physics of the machine, the geometry of the needle, and the biology of the skin.
What separates this course from the rest? We move beyond the basics. Over the coming modules, you will evolve from an enthusiast into a technician:
The Digital Alchemist: You will master the modern workflow, utilizing Procreate to design stencils that flow seamlessly with the 3D topography of muscle and bone.
The Engineer: You will understand the hardware. You will learn why a Coil machine’s “hard hit” differs from a Rotary’s consistency, and how to select the perfect voltage and stroke length for every skin type.
The Surgeon: You will dive deep into Needle Theory—understanding tapers, gauges, and cartridges—and master the medical-grade sterilization protocols that keep your clients safe.
The CEO: Finally, we tackle the business. From building a portfolio that demands respect to mastering Instagram algorithms and client psychology, we give you the tools to turn your art into a lucrative empire.
The machine is heavy in the hand, but the knowledge required to wield it is heavier. If you are ready to stop guessing and start executing with surgical precision, your journey begins now.
Stop dreaming about the ink. Start mastering the craft. Welcome to the Academy.
Tattoo training course
1.1 The London Pulse: Why Here? Why Now?
You are standing at the epicenter. London is no longer just a city; it is the global heartbeat of the modern tattoo renaissance.
Ten years ago, tattooing was relegated to back-alleys in Camden and intimidating street shops where you had to “earn your stripes” by scrubbing toilets for three years. Today, the landscape has shifted violently. We are seeing the rise of the Private Studio Model—exclusive, appointment-only spaces in Shoreditch, Soho, and Hackney that feel more like high-end medical clinics or art galleries than biker bars.
The Current State of Play (2025):
The Client Shift: Clients are no longer just rebels; they are lawyers, tech CEOs, and influencers. They demand Fine Line, Micro-Realism, and Abstract Geometry. They don’t just want ink; they want a luxury service experience.
The “Safe Space” Movement: The industry is purging its toxic past. The most successful London artists today are those who prioritize consent, inclusivity, and calm environments.
The Saturation: Yes, there are more tattooists than ever. But there is a massive shortage of professional tattooists. The market is flooded with “scratchers” (untrained amateurs). The demand for licensed, technically flawless artists is at an all-time high.
1.2 The Economics of Ink: Breaking the “Starving Artist” Myth
Let’s talk money. We don’t shy away from this at PinkTatPier. You are entering a trade.
In London, the financial disparity is brutal. It relies entirely on your ability to treat this as a business, not just a hobby.
| Career Stage | Typical London Earnings (Annual) | The Reality |
| The Apprentice | £0 – £12,000 | You will likely work for free or tips initially. This is your “tuition.” You are paying with your time to learn a trade that will feed you for life. |
| Junior Artist (Years 1-2) | £20,000 – £35,000 | You are on a “split” (usually 50/50 or 60/40 to the studio). You are building clientele. You take walk-ins. You hustle. |
| Established Artist (Years 3-5) | £40,000 – £65,000 | You have a solid book of repeat clients. You charge £100-£150 per hour. You dictate your schedule. |
| Senior / Specialist | £80,000 – £120,000+ | You are fully booked months in advance. You charge day rates (£800-£1500/day). You may guest spot in NYC or LA. |
The “London Premium”:
In Newcastle or Manchester, a palm-sized tattoomight cost £80. In London, that same piece—executed with high hygiene standards and premium branding—commands £150–£250. Location is leverage.
1.3 The Great Filter: “Talent” vs. “Grind”
This is where 90% of people fail. They believe the myth: “I need to be born with a gift.”
False.
Tattooing is not drawing. Tattooing is engineering.
Drawing is creating an image on a forgiving surface (paper) where you can erase mistakes.
Tattooing is inserting pigment into a moving, bleeding, elastic living organism (the skin) using a vibrating needle, where every mistake is permanent.
The Imposter Syndrome Killer
You will feel like a fraud. You will look at Instagram and see 19-year-olds doing hyper-realism and feel inadequate.
Here is the PinkTatPier truth: Discipline beats raw talent every single time.
At this Academy, we do not rely on “divine inspiration.” We rely on:
Digital Workflow: We teach you to use Procreate to engineer flawless stencils. If your stencil is perfect, your tattoo has a 90% chance of being perfect.
Muscle Memory: You will practice lines on fake skin until your hand cramps. Then you will do it again.
Process over Passion: Passion fades when you are tired. Process keeps your lines straight.
1.4 The PinkTatPier Philosophy: The Bridge
Why are you here? Why not just buy a cheap machine off Amazon and watch YouTube?
Because YouTube won’t teach you how to avoid a lawsuit. It won’t teach you how to handle a client who is about to faint. It won’t give you the Licensure required by the London Council to operate legally.
PinkTatPier Academy is the bridge between “Dreaming” and “Doing.”
We are Authoritative: We follow UK Health & Safety Executive (HSE) guidelines strictly.
We are Technical: We treat the tattoo machine like a surgical instrument.
We are Realistic: We will not promise you fame. We promise you a career if you survive the training.
Tattoo training course
LEGAL, SAFETY & ANATOMY – The Foundation of Compliance
“A bad tattoo can be covered. A lawsuit, a criminal record, or a transmission of Hepatitis C cannot. This chapter is not about art; it is about survival and responsibility.” — PinkTatPier Academy Health & Safety Protocol
2.1 The Legal Framework: UK Law & London Regulations
In the United Kingdom, and specifically within Greater London, tattooing is strictly regulated.1 There is no grey area. Ignorance of these laws is not a defense; it is negligence.
The Tattooing of Minors Act 1969
This is the single most critical piece of legislation you must memorize.
The Law: It is a criminal offense to tattoo anyone under the age of 18 years.
The Reality:
Parental Consent: Does NOT exist in the UK for tattooing. A parent cannot sign a waiver for a 17-year-old. If a parent demands it, you must refuse.
Consequences: Violation of this act can result in criminal prosecution, fines, and the immediate permanent revocation of your license.
Protocol: You must operate a strict “Challenge 25” policy. Valid ID (Passport or Driving Licence) is mandatory. No ID, no tattoo.
The London “Special Treatments Licence”
Operating in London adds a layer of bureaucracy unique to the capital. Under the London Local Authorities Act 1991, tattooing is classified as a “Special Treatment.”
To tattoolegally in London, two licenses are required:
The Premises Licence: The studio building itself must be inspected and licensed by the local Borough Council (e.g., Westminster, Hackney, Lambeth). The Environmental Health Officer (EHO) will inspect floors, sinks, waste disposal, and sterilization rooms.
The Practitioner Licence (Personal License): You, the artist, must be registered with the Council. You cannot simply walk into a licensed shop and start working; your name must be added to the license or you must hold an individual registration depending on the specific Borough’s rules.
Failure to display these licenses in the reception area is a breach of compliance.
2.2 Anatomy & Histology: The Science of Ink Retention
Tattooing is not painting on canvas; it is the implantation of foreign pigment into a biological matrix. To do this without causing trauma, you must understand the histology of the skin.
The skin has three primary zones. You must aim for exactly one of them.
| Layer | Structure & Function | Implication for Tattooing |
| 1. Epidermis | The outer protective shield. Consists of 5 sub-layers (Stratum Corneum to Basal Layer). Continually regenerates and sheds. | Target Missed (Too Shallow). If you deposit ink here, it will “fall out” within 3 weeks as the skin regenerates. The tattoo will disappear or look patchy. |
| 2. Dermis | The “Sweet Spot.” Specifically the Papillary Dermis. Stable connective tissue containing collagen, elastin, and capillaries. | Target Hit. Ink deposited here is trapped by immune cells called Macrophages. The macrophages engulf the pigment but cannot break it down, locking it in place permanently. |
| 3. Hypodermis | Subcutaneous tissue containing fat cells and larger blood vessels. | Target Missed (Too Deep). Ink deposited here spreads uncontrollably through the fat. This causes a “Blowout”—a blurred, blue/green haze surrounding the lines. It causes scarring and excessive bleeding. |
The Biological Reaction
When the needle penetrates the Dermis:
Trauma: The body recognizes a wound.
Inflammation: White blood cells rush to the site.
Encapsulation: Fibroblasts create a mesh of collagen around the pigment particles, sealing them into the Dermis.
2.3 Infection Control: The Sterile Field
We operate under Level 2 Infection Control standards. You must think like a surgeon, not an artist.
The Chain of Infection
You must break the chain to prevent cross-contamination.
Vector: The machine, the clip cord, your chair, the spray bottle.
Portal of Entry: The open wound (the tattoo).
Pathogen: Staphylococcus, Hepatitis B/C, HIV.
Equipment Sterilization & Barriers
Autoclave Class B: The industry standard for sterilizing reusable metal grips. It uses a vacuum cycle to remove air before injecting high-pressure steam at 134°C. Note: Most modern artists use single-use disposable cartridges and grips, eliminating the need for autoclaving, but the knowledge is mandatory.
Ultrasonic Cleaner: Used before the autoclave to remove debris (blood/ink) from tools via high-frequency sound waves. This is cleaning, not sterilizing.
Barrier Protection: Everything you touch must be covered in single-use plastic.
Machine Bags: Cover the entire machine.
Clip Cord Sleeves: Cover the power cable.
Barrier Film: Applied to the power supply, lights, and workstation surface.
Tattoo training course
Waste Management
You cannot throw tattoo waste in a black bin bag. It is illegal.
Sharps Bin (Yellow/Orange Lid): For needles and cartridges. Once 3/4 full, it is sealed and collected by a licensed hazardous waste contractor.
Clinical Waste (Orange Bags): For soft waste contaminated with blood (gloves, paper towels, ink caps). This is incinerated.
2.4 Contraindications: When to Refuse Service
As a professional, your primary duty is the client’s safety. You must conduct a consultation to identify Contraindications—conditions that make tattooing unsafe.
Absolute Contraindications (DO NOT TATTOO):
Under the influence: Alcohol or drugs thin the blood (increasing bleeding/rejecting ink) and impair consent.
Pregnancy/Breastfeeding: Risk of infection affecting the fetus/infant. The immune system is also compromised.
Sunburn/Damaged Skin: You cannot tattoo over damaged tissue.
Relative Contraindications (REQUIRE GP NOTE/CAUTION):
Diabetes: Slow healing, higher infection risk.
Eczema/Psoriasis: Do not tattoo directly over active flare-ups.
Blood Thinners: Ask client to consult their doctor.
Keloid Scarring: If a client has a history of keloids, tattooing may trigger them.
The Digital Alchemist – Artistry & Workflow
The romantic image of the tattooartist hunched over a drafting table, surrounded by erasers and crumpled tracing paper, is a classic. But for the modern professional, speed, precision, and adaptability are the new currencies. While the soul of tattooing remains rooted in art, the workflow has evolved.
We are moving beyond the limitation of physical media. You are no longer just an artist; you are a digital alchemist, transmuting pixels into permanent ink. This chapter focuses on bridging the gap between the concept in your mind and the living canvas of the client, utilizing the industry-standard tools that have revolutionized the craft.
1. The Digital Canvas: Mastering Procreate
If the tattoo machine is your sword, the iPad is your shield. Procreate has become the undisputed king of tattoo design software, not just for its ease of use, but for its ability to mimic natural media while offering non-destructive editing. You can iterate a design ten times in the time it used to take to trace it once.
Setting the Foundation
Start with a high-resolution canvas. A standard setting of 300 DPI (Dots Per Inch) is non-negotiable; anything less will result in pixelated stencils that become blurry nightmares when printed. Aim for a canvas size roughly the size of the body part you are tattooing (e.g., 11×14 inches for a back piece).
The Layered Workflow
The greatest advantage of digital design is Layers. Think of them as sheets of acetate.
- Layer 1: The Rough (The “Bone” Structure).Use the 6B Pencil brush (under the Sketching tab). This brush mimics the grain and texture of soft graphite. Keep your hand loose. Here, you aren’t drawing lines; you are finding shapes. Capture the gesture and the composition without worrying about cleanliness.
- Layer 2: The Refine.Lower the Opacity of Layer 1 to about 30%. Create a new layer on top. Now, start making decisions. Which of those rough lines is the true line? Tighten the anatomy of your design.
- Layer 3: The Stencil Line.This is the most critical step for the tattooer. Hide the rough layer. Lower the opacity of the refined layer. Select the Monoline brush (under the Calligraphy tab). This brush has no pressure sensitivity regarding size—it creates a consistent, solid line perfect for thermal printers. Trace your design with intent. This is the map you will follow with your needle.
Pro Tip: When designing for a stencil, leave “breathing room.” Don’t pack your lines so tight that they bleed together on the transfer paper. If the lines are black, the spaces between them are the skin—the light. Both are equally important.
2. Anatomy & “Body Flow”
A drawing on a flat screen is a lie. The human body is a cylindrical, shifting, 3D topography. A perfectly straight sword drawn on an iPad will look like a bent noodle when placed on a flexing bicep.
Designing for Movement
You must design with the musculature, not against it. This is called Body Flow.
The Deltoid Cap: Designs here should generally be rounded or teardrop-shaped to cup the shoulder muscle. If you place a square frame here, the corners will distort awkwardly when the client raises their arm.
The Forearm Wrap: When the arm twists (pronation/supination), the skin moves significantly. Avoid straight horizontal lines wrapping around the forearm; they will never look straight in motion. Instead, use S-curves and spirals that flow diagonally along the muscle groups. These shapes absorb the distortion naturally.
The Photo Mock-up
Before you finalize a stencil, take a photo of the client’s body part. Import that photo into Procreate as your bottom layer. Use the Warp Tool to mold your design over their anatomy digitally. Show this to the client. It helps them visualize the final result and helps you catch placement errors before the stencil ever touches the skin.
3. The Transfer: From Screen to Skin
You have the perfect digital design. Now you need to get it onto the skin with surgical precision. The era of hand-tracing hectic purple carbon paper is fading; thermal printing is the standard.
The Hardware: Thermal Printers
Brother PocketJet: The gold standard. These printers use heat to burn the image onto the stencil paper. They are portable, inkless, and capable of capturing incredible detail.
Epson EcoTank (Stencil Ink): A popular alternative involves converting an Epson EcoTank printer by filling it with specialized stencil ink (like Methyl Violet). This allows for printing via Wi-Fi directly from the iPad, handling intricate shading gradients better than some thermal units.
The Application Ritual
Applying the stencil is the moment of truth. If the stencil is bad, the tattoo will be bad.
Prep the Skin: Shave the area. Clean it with Green Soap to remove oils, then follow with alcohol to sterilize and dry the skin completely.
The Bond: Apply a thin, even layer of transfer solution, such as Stencil Stuff. “Thin” is the keyword. If it’s too wet, the stencil will bleed and blur. If it’s too dry, it won’t transfer. You want a tacky, shiny surface—not a puddle.
The Placement: Have the client stand in a neutral, natural posture. Do not apply a stencil to a twisted torso or a flexed arm, or the tattoo will look warped when they relax.
The Press: Apply the stencil paper starting from the center and smoothing outward to push out air bubbles. Hold it firm for 5–10 seconds.
The Reveal & Dry: Peel it off carefully. Wait. This is the step most rookies skip. Let the stencil dry for at least 10–15 minutes. This locks the purple agent into the pores. If you start tattooing immediately, you will wipe your guide away with the first pass of a paper towel.
Here is Chapter 4, written with a focus on technical engineering and specialized mechanical theory.
The Mechanic’s Soul – Machinery & Needle Science
To the uninitiated, a tattoomachine is simply a buzzer that hurts. To the professional, it is a precision instrument of reciprocating mass, electromagnetic variance, and fluid dynamics. Understanding your equipment at an engineering level is what separates a scratcher from a craftsman. When something goes wrong in the skin—a blown-out line, a patchy fill—the amateur blames the skin. The professional checks their stroke length, voltage, and needle taper.
This chapter strips away the romance and focuses on the physics of the tools.
1. The Engine: Coil vs. Rotary Physics
The debate between coil and rotary is not just about preference; it is about the mechanics of force delivery.
The Coil Machine: The Electromagnetic Hammer
The traditional coil machine operates on an electromagnetic circuit. When the circuit completes, the coils become magnets, pulling the Armature Bar down. This drives the needle into the skin. When the bar hits the coils, it breaks the circuit, the spring pulls the bar back up, and the cycle repeats.
The “Hard Hit”: Coils are revered for their “give” and their “punch.” Because the needle is driven by magnetic force and returned by a spring, there is a micro-second of lag or “give” when the needle hits resistance (tough skin). This acts like a natural suspension system. However, the hit is percussive. It strikes the skin with an aggressive, snappy force that makes it the king of driving thick, single-pass lines.
Tuning: A coil requires constant mechanical tinkering. You are adjusting contact screws, swapping capacitor values, and bending springs to change the duty cycle.
The Rotary Revolution: Direct Drive Consistency
Modern rotaries, like the Bishop Packer or FK Irons Flux, utilize a DC motor to drive a cam or a swashplate. This converts rotational energy into linear motion.
The “Linear” Hit: Unlike a coil, a rotary has almost zero “give.” If the motor is turning, that needle is moving, regardless of skin resistance. This provides extreme consistency.
Bishop Packer: Known as a powerhouse for color realism and traditional packing. It typically uses a heavy cam to generate high torque at lower voltages, allowing you to “shovel” pigment into the skin without chewing it up.
FK Irons / Pen Styles: These machines center the weight over the back of the hand, reducing fatigue. They rely on sophisticated “E-Give” (electronic give) systems to simulate the feel of a coil, but the core mechanic remains the unyielding precision of a DC motor.
Tattoo training course
Stroke Length: The Distance of Travel
The stroke is the distance the armature bar or cam travels from its highest to lowest point.
Short Stroke (2.5mm – 3.0mm): Soft hitting. Ideal for smooth black and gray shading. It brushes the skin rather than punching it.
Medium Stroke (3.5mm): The “All-Rounder.” Good for lining and color packing.
Long Stroke (4.0mm+): Hard hitting. The needle travels further, building more momentum before impact. This is essential for bold traditional lining (pushing large needle groupings) and packing solid black.
2. Power Dynamics: Voltage, Hz, and Hand Speed
Voltage is not just volume; it is frequency. In a rotary machine, Voltage determines the Revolutions Per Minute (RPM) of the motor, which directly correlates to the cycles per second (Hertz) of the needle.
The Formula of Flow
There is a critical synchronization required between your machine speed (Voltage) and your hand speed (Movement).
High Voltage + Slow Hand: The needle punctures the same spot too many times. This creates a “hamburger effect,” causing excessive trauma and scabbing.
Low Voltage + Fast Hand: The needle cannot keep up with your movement. This creates a “snagging” effect, resulting in dotted, weak lines.
Finding the Sweet Spot
Lining: generally requires higher voltage (e.g., 8.5V – 9.5V on a rotary) because the hand moves quickly to pull a clean, straight line. You need the needle to cycle fast enough to deposit a solid trail of ink.
Shading: generally allows for lower voltage (e.g., 6.5V – 7.5V). When “whipping” or “brushing” for shading, you often want to see the individual pixelation of the dots (stippling). Lowering the voltage slows the needle, allowing the spacing between punctures to widen as you sweep your hand.
3. The Point of Contact: Needle Science
The needle is the delivery system. Understanding the geometry of the metal is essential for controlling ink flow and trauma.
Diameter (Gauge)
The thickness of the individual pins that make up a needle grouping.
#12 (0.35mm) – Standard: The industry standard. Delivers a healthy amount of ink. Used for bold Traditional work and solid lining.
#10 (0.30mm) – Bugpin: Thinner pins. These are tighter and restrict ink flow slightly. They are favored for realistic portraits and smooth black and gray because they create smaller puncture wounds, allowing for smoother gradients and less redness.
#08 (0.25mm): Extremely fine. Used for hyper-detailed micro-realism.
Taper: The Geometry of the Tip
The taper refers to the length of the point at the end of the needle.
Short Taper: The point is blunt. It punches a larger hole, allowing more ink to flow quickly. Great for packing solid color.
Long Taper (LT): The point is long and sharp. It creates a tiny, precise puncture. The ink flows slower. Essential for tight lining and detailed realism.
Extra Long Taper (XLT): Surgical precision. “Tight” liners often use these.
Configurations & Usage
1. Round Liners (RL):
Pins are soldered in a tight circle to create a single point.
3RL – 5RL: “Tight” groupings. Used for script, fine detail, and “single needle” looks.
7RL – 9RL: The bread and butter. Standard outlines for Neo-traditional or illustrative work.
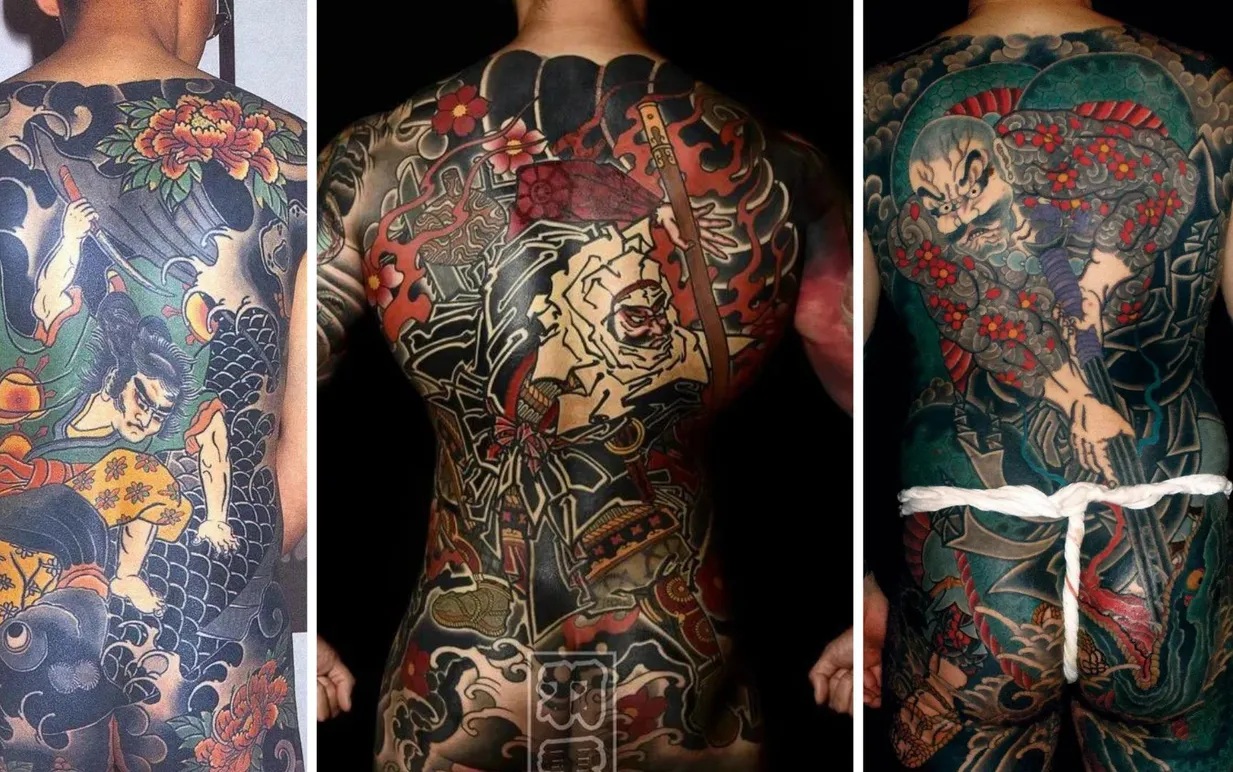
11RL – 14RL: “Bold” groupings. Used for American Traditional and Japanese outlines. These require higher voltage and a longer stroke to penetrate effectively.
2. Round Shaders (RS):
Similar to liners, but the pins are soldered straight, not pinched at the tip. This keeps the pins parallel, creating a wider surface area.
Use: Thickening lines, coloring small tight corners, and textured shading.
3. Magnums (M1):
Pins are arranged in two rows, flat and stacked.
Classic Magnum (M1): The tips are in a straight line.
Drawback: The corners of the magnum are sharp. If you tilt your machine, the corner digs in, causing a “cut” in your shading.
Curved Magnum (RM/CM – Round Mag / Soft Edge): The tips are arranged in an arch.
The Engineer’s Choice: This design mimics the softness of a paintbrush. The edges recede, meaning no sharp corners dig into the skin. This is the ultimate tool for soft shading and color blending. It allows you to “feather” edges without leaving stop marks.
4. The Cartridge System: Hygiene & Mechanics
The industry has largely shifted from needle-on-bar to the Cartridge System. This places the needle grouping inside a plastic housing that snaps into the machine.
The Membrane Safety Mechanism
Not all cartridges are created equal. You must use cartridges with a Full Safety Membrane.
Function: This is a rubber barrier inside the cartridge housing. It pulls the needle back (acting as a spring) but, more importantly, it seals the back of the cartridge.
Risk: Without a membrane, ink and blood can wick up the needle shaft, travel through the plunger, and enter the motor of your machine. This causes cross-contamination that cannot be cleaned, as you cannot autoclave an electric motor.
Stabilization
High-end cartridges (like Kwadron or Cheyenne) feature internal stabilizers to prevent “needle wobble.”
Wobble: When the needle vibrates side-to-side inside the tip. This results in “shaky” lines even if your hand is steady.
The Fix: Precision molding and stiff membranes ensure the needle strikes the exact same center point on every cycle.
Here is Chapter 5, focusing on the practical execution of the tattoo and the biological science of healing.
Tattoo training course
The Procedure & The Biology of Permanence
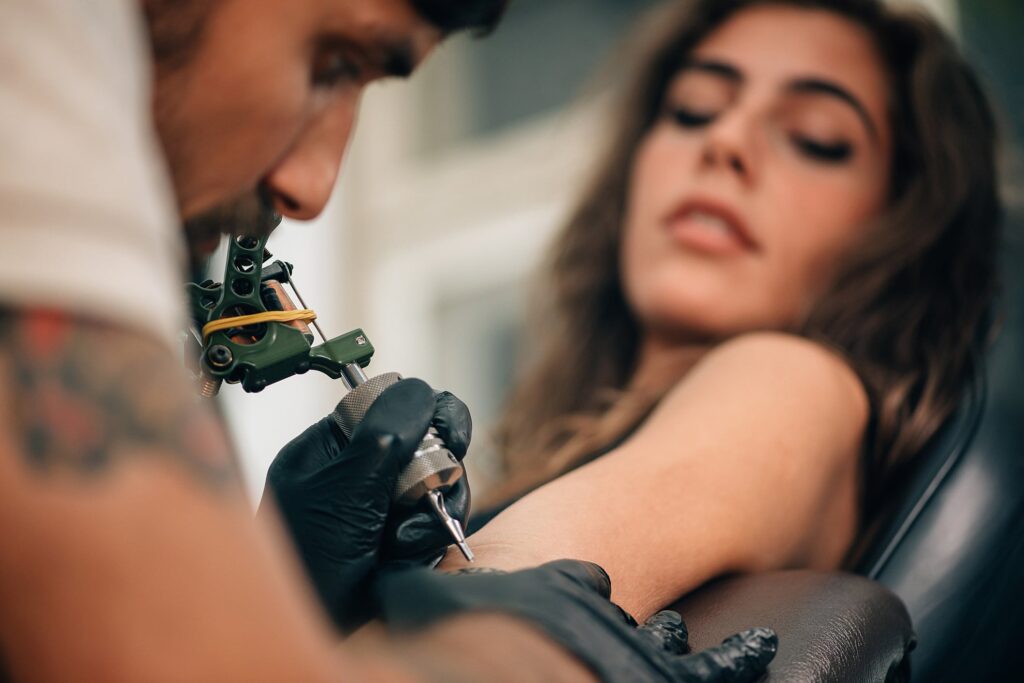
You have built the station, designed the art, and tuned the machine. Now comes the moment of contact. This is where theory meets biology. Tattooing is a surgical procedure performed in an artistic setting. It requires the steadiness of a sniper and the touch of a painter.
This chapter breaks down the physical mechanics of inserting pigment into the skin and the biological warfare that ensues immediately after to make that pigment permanent.
1. The Foundation: The 3-Point Stretch
Before the needle ever touches the client, you must master The Stretch.
Skin is not canvas; it is an elastic, uneven, living rubber sheet. If you try to tattoorelaxed skin, the needle will bounce. It will snag, catch, and create “skips” in your line work. Worse, the vibration will cause the needle to chew the skin rather than pierce it.
To create a solid surface, you must turn the skin into a drumhead. We use the 3-Point Stretch:
Point A (Stretching Hand – Thumb): Place your non-tattooing thumb firmly on the skin and pull away from the tattoo area.
Point B (Stretching Hand – Index Finger): Place your index finger opposite your thumb and pull in the opposite direction. You have now created a linear stretch.
Point C (Tattooing Hand – Palm/Pinky): This is the secret. The palm or pinky of the hand holding the machine plants firmly on the skin below the area you are about to tattoo and pulls down.
The Result: A triangle of tension. The skin inside this triangle should be tight and unmoving.
The Rule: Never tattoo outside the stretch. If you need to move the line three inches, you stop, wipe, re-apply the stretch, and continue.
2. Mechanics of the Stroke: Lining vs. Shading
The angle of insertion and the speed of your hand determine whether you are cutting a line or blending a shadow.
Lining: The Perpendicular Pierce
A solid outline requires the needle to penetrate straight down into the dermis to deposit a concentrated column of ink.
The Angle: Hold the machine upright, roughly 70 to 90 degrees relative to the skin.
Why? If you line at a low angle (45 degrees), the ink will “blow out” sideways under the skin, creating a fuzzy, blurry line as it heals. An upright angle ensures the ink stays exactly where you put it.
The Depth: You are aiming for 1.5mm to 2mm deep—the “sweet spot” between the epidermis (top layer) and the subcutaneous fat. You will feel a subtle vibration change when you hit the dermis; it feels like drawing on a grapefruit.
The Speed: Lining requires a steady, confident pace. If you move too slow, you cut the skin (slicing). If you move too fast, you get a “skipping” line that looks like Morse code.
Shading: The Angled Brush
Shading is about layering, not trenching. You want to build up tone without traumatizing the tissue.
The Angle: Drop the machine low, to about 45 degrees.
Why? This allows the needle grouping (like a Magnum) to act like a shovel or a brush. You are glancing off the skin layers, depositing ink in a gradient rather than a deep trench.
The Motion:
Packing Color: Small, tight ovals. You are slowly massaging the ink into the skin to get solid saturation.
Whip Shading: A pendulum motion. The needle enters the skin at the bottom of the stroke and you “flick” or “whip” it out as you move up. This creates a gradient from dark to light in a single motion, as the needle spends less time in the skin at the end of the whip.
3. Liquid Engineering: Ink Viscosity & Load
Not all black ink is created equal. The chemistry of your pigment affects how it enters the skin and how it ages.
Carbon Load & Viscosity
Lining Inks (e.g., Dynamic Black): These are usually thinner (lower viscosity) but have an incredibly high carbon load.
The Logic: A thinner ink flows instantly off the needle tip. When you are pulling a fast line, you need that ink to flow immediately. If the ink is too thick, the needle will move faster than the ink can flow, resulting in a dry, faint line. Dynamic Black is the industry favorite for its ability to heal a stark, blue-black.
Packing/Tribal Inks (e.g., Panthera, Intenze Zuper Black): These inks are often thicker, with a “gloppier” consistency.
The Logic: When filling a large area solid black, you want the pigment to stay put. The thicker consistency allows the magnum to pick up a large amount of ink and push it into the skin without it running everywhere.
The Dip
Don’t dip your needle all the way to the bottom of the ink cap; you’ll hit the plastic and dull your needle tip instantly. Dip only the tip. The surface tension and the reservoir of the cartridge tip will suck up the ink.
4. The Biology of Permanence
What actually makes a tattoo permanent? The answer is your immune system.
When the needle punctures the skin, the body treats it as a trauma. It recognizes the ink particles as foreign invaders.
The Attack: The body sends white blood cells, specifically Macrophages, to the site of the wound to “eat” the invaders.
The Trap: The macrophages engulf the ink particles. However, the ink particles are too large for the macrophages to break down.
The Stasis: The macrophages, now full of ink, get stuck in the gel-like matrix of the dermis. They die there, suspended in place. The ink you see in a healed tattoo is actually trapped inside the corpses of your own immune cells.
Fading: Over years, some macrophages manage to escape to the lymph nodes (which is why tattooed people often have ink-colored lymph nodes), causing the tattoo to fade or blur slightly.
5. Healing Protocols: Dry vs. Wet
The tattoo is finished. The skin is raw, leaking plasma and excess ink. How you manage the next 72 hours determines 50% of the final look.
The Old School: Dry Healing
This was the standard for decades.
The Method: Wash the tattoo with antibacterial soap. Pat dry. Apply a very thin layer of ointment (Aquaphor or A&D) for 2-3 days, then switch to unscented lotion (Lubriderm).
The Process: The tattoo will form a scab. As the skin regenerates underneath, the scab itches and eventually flakes off.
The Risk: If the client picks the scab, they pull the ink out, creating white spots (“holidays”) in the tattoo. It is high-maintenance and relies on the client not messing it up.
The Modern Standard: Wet Healing (Saniderm / Second Skin)
This method utilizes medical-grade, breathable, self-adhesive polyurethane film (originally designed for burn victims).
The Method: Immediately after tattooing, clean the area and apply the adhesive film over the tattoo. Leave it on for 24 hours.
The Plasma Sack: The bandage will fill with a gross, murky liquid. This is plasma, blood, and excess ink. This is liquid gold. Your body produces enzymes in this fluid that actively heal the wound.
The Swap: After 24 hours, peel it off, wash the tattoo, and apply a fresh piece of film. Leave this second piece on for 3 to 5 days.
The Result: Because the tattoo never dries out, no scabs form. The skin knits back together underneath the protective layer. When you take the bandage off on day 5, the tattoo is essentially healed, vibrant, and smooth. It reduces healing time and eliminates the risk of infection from dirty environments.
Here is Chapter 6, the final chapter, written with the tone of a seasoned mentor and business strategist.

Tattoo training course
The Business of Art – Turning Ink into Income
You now possess the knowledge. You understand the history, the machine, the needle, and the skin. But let me be blunt: Talent alone will starve. The world is full of incredible artists who are broke because they treat tattooing as a hobby, not a profession. To survive in this industry, you must be a CEO, a marketing director, and a diplomat—all before you even pick up your machine.
This final chapter is your roadmap from the bedroom to the studio.
1. The Portfolio: Your Passport
If you decide to seek an apprenticeship outside the walls of our academy, your portfolio is your only currency. A mentor does not care about your “potential”; they care about your discipline.
Cleanliness Over Chaos: Do not show loose sketches, napkin doodles, or messy charcoal smudges. Mentors look for linework. Can you pull a clean, single-pass line? Include finalized drawings of roses, daggers, eagles, and script. Ink them with Micron pens or print your Procreate stencils. Show that you can finish what you start.
Variety is Safety: You might love Neo-Traditional, but can you draw a proper script font? Can you execute a geometric mandala? A shop needs an apprentice who can handle walk-ins of any style. Show versatility.
Presentation: Buy a sleek black binder with high-quality plastic sleeves. Do not hand a mentor a stack of loose papers. How you treat your art is how you will treat their clients.
2. The Hunt: Securing an Apprenticeship
If you aren’t staying with PinkTatPier, you are entering the wild. Finding a mentor is harder than learning to tattoo.
The Approach: Never DM a shop asking for an apprenticeship. It is lazy and disrespectful. Go in person. Get tattooed by the artists there. Build a relationship first.
The “No”: You will be rejected. You will be told your art isn’t good enough. Good. Use that. Ask why, fix it, and come back in a month. Persistence is the first test.
Red Flags: Avoid shops that ask for thousands of dollars upfront without a contract, or shops that treat apprentices purely as janitors with no structured learning. A mentorship is an exchange: your labor for their secrets. If there is no teaching, leave.
3. The Digital Storefront: Instagram & Photography
In the modern era, if it isn’t on Instagram, the tattoo didn’t happen. Your feed is your resume, and a bad photo makes a great tattoo look like a scratcher’s mistake.
The “No-Glare” Secret: CPL Filters
Have you ever taken a photo of a fresh tattoo and it looks wet, shiny, and obscured by white glare? That is light bouncing off the plasma and ointment.
The Fix: You need a CPL (Circular Polarizing Linear) Lens. This is a clip-on filter for your phone camera (or a lens for your DSLR).
How it Works: You rotate the filter ring, and like magic, it cuts through the glare. It removes the surface reflection, allowing the camera to see the ink in the dermis, not the slime on the epidermis. It increases contrast and saturation instantly.
Lighting the Shot
The Ring Light: Standard for a reason. It provides even, shadow-less light.
Diffused Light: Never use the direct flash of your phone. It washes out the skin tone. Use a softbox or bounce light off a wall to create a soft, flattering glow that highlights the form of the muscle.

Tattoo training course
4. Client Management: The Shield
You are in the service industry. You deal with pain, money, and permanent decisions. You need boundaries.
The Deposit: never book an appointment without a deposit. The deposit is not just money; it is a contract of respect. It ensures the client shows up, and it compensates you for your drawing time if they flake. Non-refundable.
The Paper Trail: Every client, every time, signs a consent form. This covers medical history, ID verification, and liability release. In the age of lawsuits, this is your shield.
The Power of “No”: You are the expert. If a client wants a micro-sized portrait on the side of their foot (where it will fade in a week), it is your duty to say No. Explain why. Offer a better alternative. If they refuse, let them walk. A bad tattoowalking around town with your name on it is worse than losing $100.
5. Conclusion: The Fork in the Road
We have covered the spectrum—from the ancient soot of our ancestors to the digital precision of Procreate; from the electromagnetic punch of the coil machine to the biological warfare of healing.
You now have a choice.
You can take this information, buy a cheap kit online, and try to piece together the rest on your own. You can struggle through the trial and error, scarring friends and learning the hard way, risking infection and bad habits that will take years to unlearn.
Or, you can get serious.
The PinkTatPier Academy Advantage
At PinkTatPier Academy, we don’t just teach you to draw; we build careers.
Hands-On Mentorship: Stop reading and start doing. Work alongside masters who correct your hand angle in real-time.
Business Certification: We teach you how to open your LLC, manage your taxes, and market your brand.
The Network: Graduates of our academy don’t just get a certificate; they get a family. They get placement assistance in top studios and access to guest spot opportunities worldwide.
The machine is heavy. The skin is unforgiving. The industry is competitive. Do not go into battle alone.
Apply to PinkTatPier Academy today.